1. Introduction
This article will be about how to develop the messaging system with the serverless approach. We will use AWS as a cloud provider. We will prefer .NET Core as the language.
In this part, I will set up the scenario and give preliminary information about what will be the result.
Our RESTful API endpoints will be as follows.
[POST] api/comments
[GET] api/comments
We will use the AWS services below.
API Gateway : It will provide the endpoints we need for the RESTful API.
Lambda : It will provide us to write function for the GET and POST requests.
SQS : It will provide a messaging system. In POST request, we will send the comment texts to the queue for later processing.
Comprehend : It will provide machine learning system. We will use it to detect the languages of the comment texts entered.
DynamoDB : It will provide NoSQL solution. In the POST request, we will write the data to the DynamoDB.
S3 : It will provide our code to be versioned and stored after each deployment.
CloudFormation : It will provide us to create and manage automatically all services mentioned above.
When the project is completed, the architecture on AWS will be as follows.
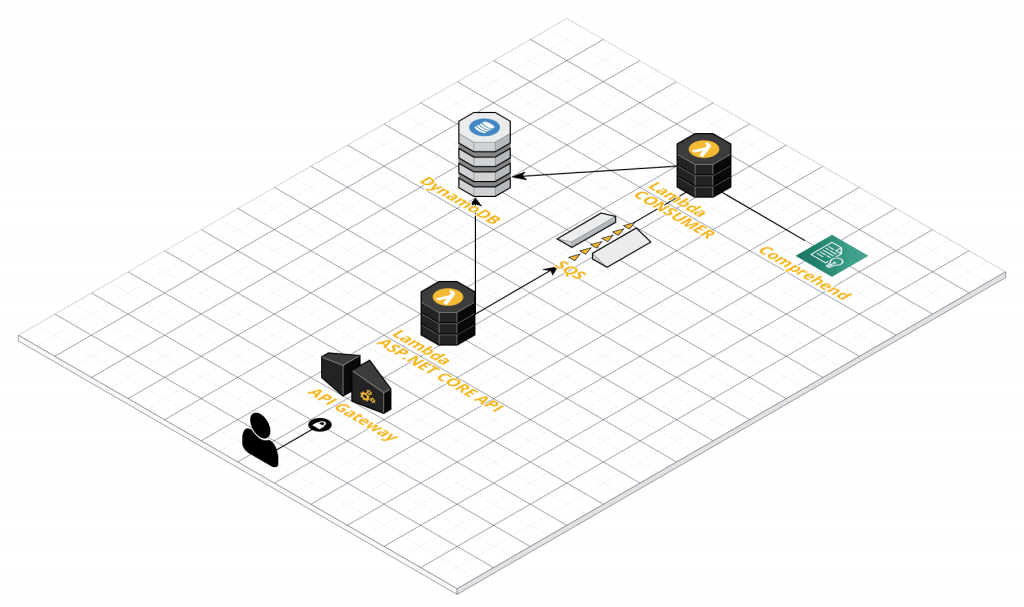
We will get the comment text from the API with the POST method. We will save this comment to DynamoDB and return result. Since it will take a long time to automatically detect the language of the comment text, we will send the comment text to the queue. The lambda function, which listens to the messages in the queue will use the Comprehend service to detect the language. After getting the result, the record in DynamoDB will be updated. We will return the final version of the comment texts with the GET method from the API.
2. Preparing Development Environment
In this part, we will arrange the development environment. We can apply the second part of the article, Developing AWS Serverless RESTful API. We need to include the following policies in the permission section.
- AmazonSQSFullAccess
- ComprehendFullAccess
3. Preparing API Project
In this part, we will create the project in its simplest form and make deployment. We will not send data to DynamoDB and SQS yet. We will send request to endpoints and get response.
Create the project folder with the command line below.
    mkdir serverless-sqs
cd serverless-sqs
code .
We will create two separate projects. One is the API project and the other is the Consumer project, which listens to the messages in the queue. Create an api folder with the following command line from the terminal from VS Code and enter the folder.
    mkdir api
cd api
Create the serverless project with the command line below.
serverless create --template aws-csharp --name comments-api
We will see a file named "Handler.cs". This is the entry point of the application. We will need two functions, GET and POST. While this is possible in Nodejs, it is troublesome in .NET Core. Because we will need to edit the output manually and it is something you would not like :). Therefore, we will make arrangements for the ASP.NET Core API to run when a request comes to lambda. In this way, we will direct the requests to actions on the controller with the help of proxy.
Start with cleaning first. Delete the file "Handler.cs". Delete the installed packages with the following command lines.
    dotnet remove package Amazon.Lambda.Core
dotnet remove package Amazon.Lambda.Serialization.Json
Change the "hello.zip" in the build.cmd and build.sh files in the project as "api-handler.zip". When we build the project, an artifact named properly shall be created. :) Shortly after, I will show how to use this artifact in serverless.yml.
We need to install some packages because we will run ASP.NET Core API. Install the packages with the following command lines.
    dotnet add package Microsoft.AspNetCore.App -v 2.1.4
dotnet add package Amazon.Lambda.AspNetCoreServer
dotnet add package AWSSDK.Extensions.NETCore.Setup
Create a file named "Startup.cs" and paste the following code.
Now, set the entry point of the lambda. Create a file named "LambdaEntryPoint.cs" and paste the code below.
Update the serverless.yml file with the code below.
On the 16th line, specify the entry point of the application as a LambdaEntryPoint file.
On the 19th line, create a proxy endpoint in the API Gateway. In this way, we transfer the requests coming to API Gateway directly to the Controllers matching in the project.
On the 23th line, specify the path of the artifact we need when deploying the application.
Now we can create Controller. Create a folder named "Controllers" and create a file named "CommentsController.cs" in it. Paste the code below.
Create a folder named "Models" and create a file named "CommentsPostRequest.cs" in it. Paste the code below.
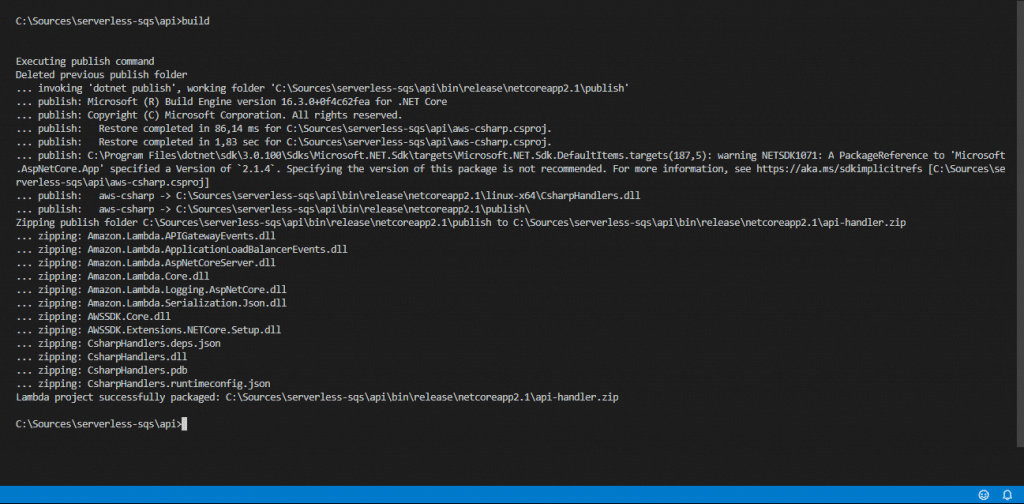
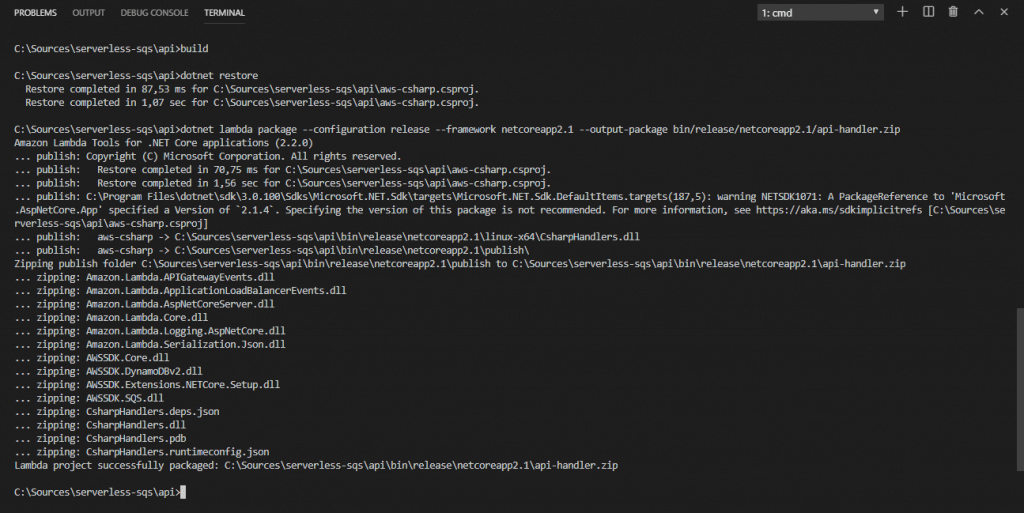
Build the code with the command line below.
build
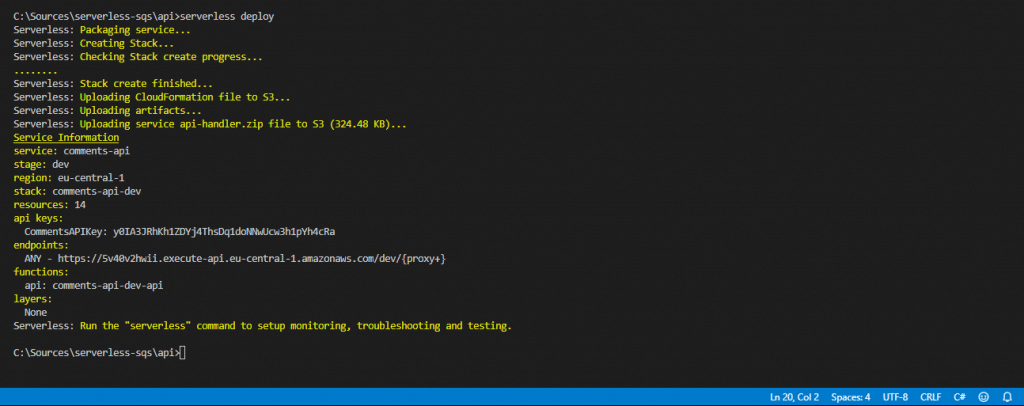
Make our first deployment to AWS with the command line below.
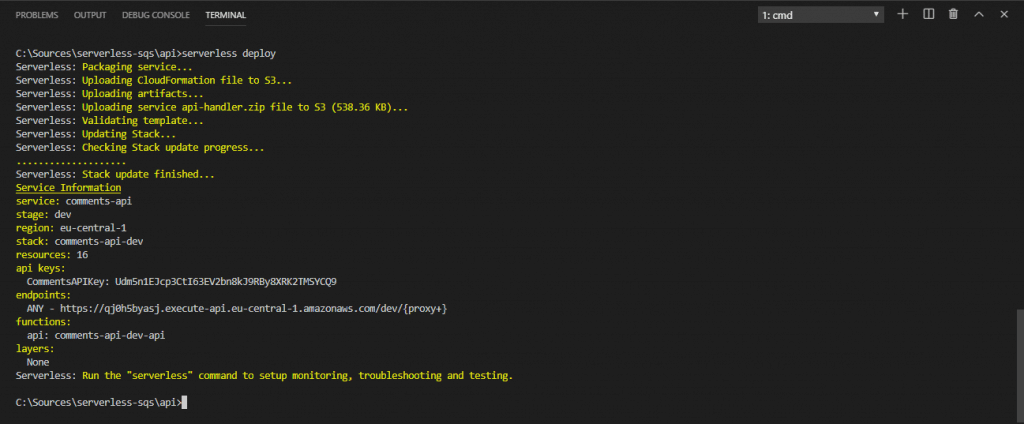
serverless deploy
After the deployment process, it will write 1 endpoint and 1 API Key on the console.
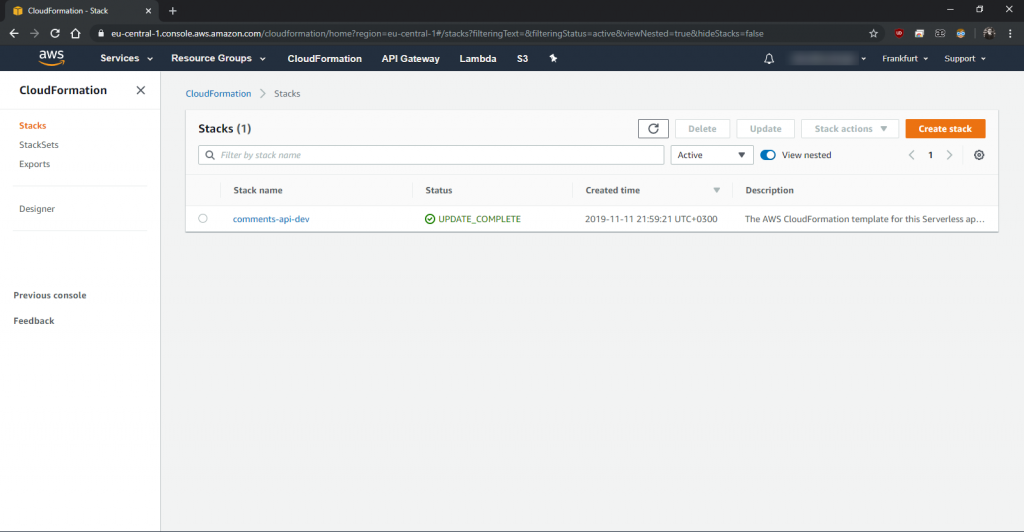
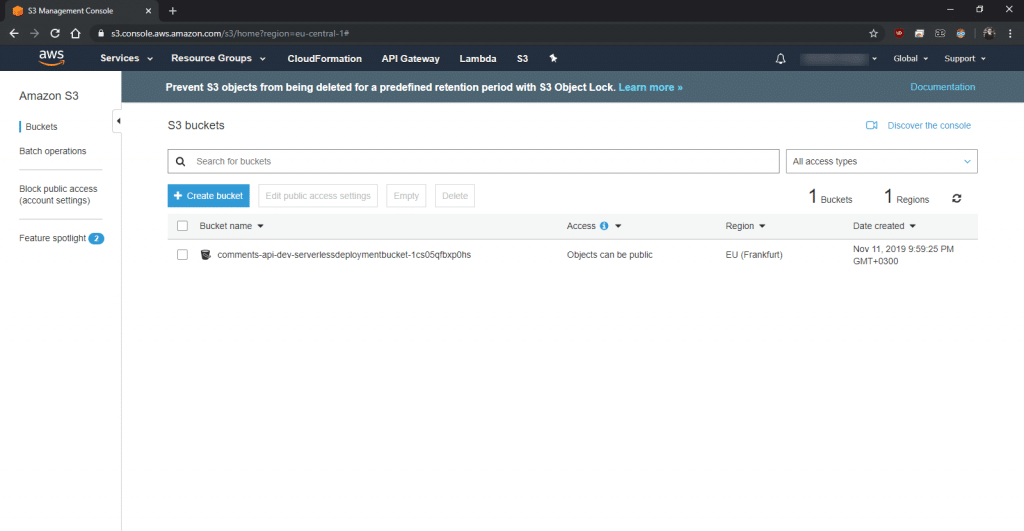
Let's look at what changed in AWS after the process.
A Stack has been created in the Cloud Formation.
Our code has been sent to S3.
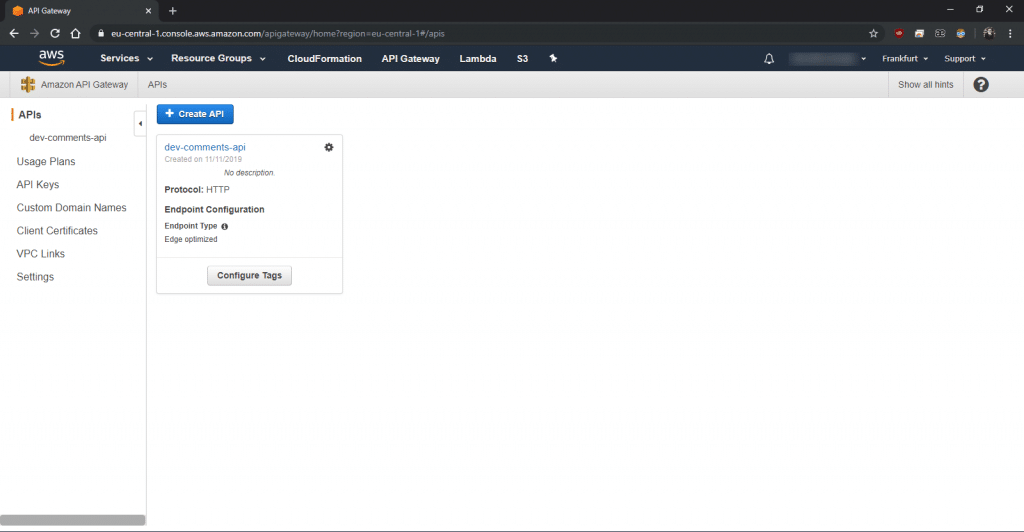
API Gateway has been created for the endpoints.
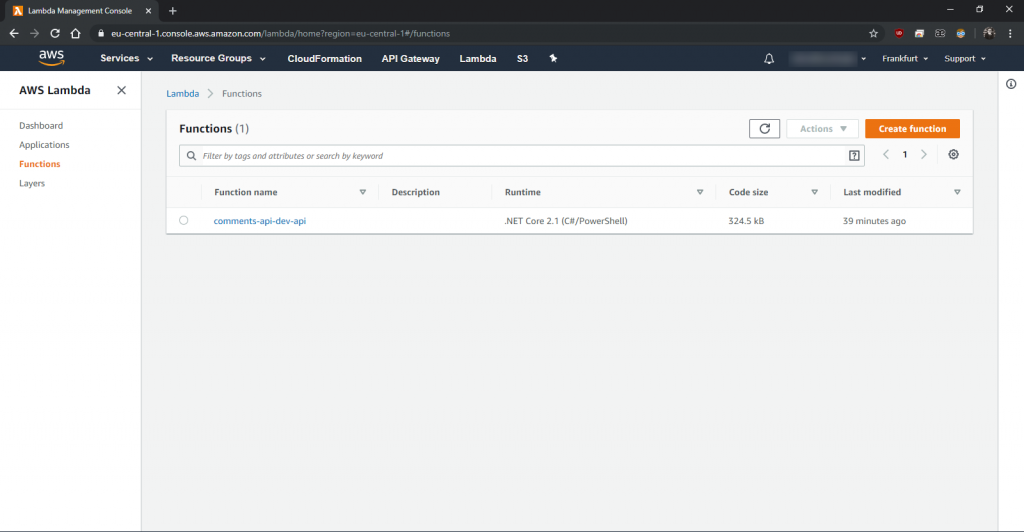
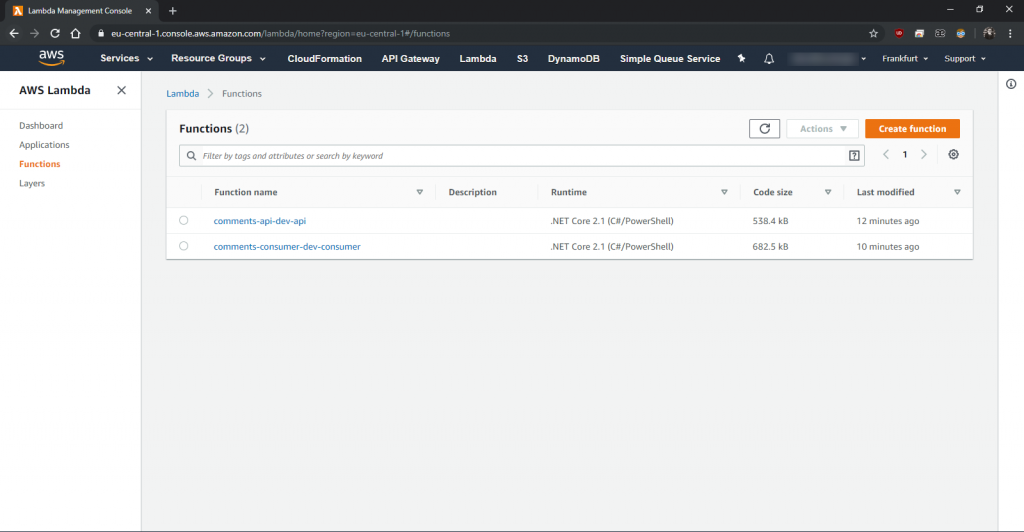
Lambda function has been created.
4. Integrating DynamoDB and SQS into API Project
In this part, we will write the comment text to DynamoDB in the POST request coming from the API and send a message the queue in SQS. In the GET request, we will return the comment texts from DynamoDB.
Install the packages we need with the following command lines.
    dotnet add package AWSSDK.DynamoDBv2
dotnet add package AWSSDK.SQS
Update the serverless.yml file as follows.
On the 43th line, define the resource that will be created for DynamoDB.
On the 46th line, name the table.
On the 66th line, export the ARN of DynamoDB that we have created. On the 72th line, export the name of the table. We will use DynamoDB by importing this ARN and the table name we have exported to the consumer project.
On the 11th line, assign the name of the table we have created as environment variable.
On the 23th line, give full access to DynamoDB, which we have created on lambda.
On the 40th line, define the resource that will create the SQS.
On the 43th line, name the queue.
On the 78th line, export the ARN of the SQS we have created. We will use SQS by importing this ARN we have exported to the consumer project.
On the 13th line, assign the name of the table we have created as environment variable.
On the 18th line, give full access to lambda that it to SQS.
Update the Startup.cs file as follows.
On the 12th and 1t3th lines, register DynamoDB and SQS clients to IOC Container.
Create a file named "CommentsGetResponse.cs" under the Models folder and paste the code below.
Create a file named "CommentsQueueRequest.cs" under the Models folder and paste the code below.
Update the CommentsController.cs file with the code below.
On the 39th line, return the comment texts from DynamoDB.
On the 61th line, save the comment text to DynamoDB.
On the 76th line, send a message to the queue we have created in SQS to be processed.
Build the code with the command line below.
build
Make our deployment to AWS with the command line below.
serverless deploy
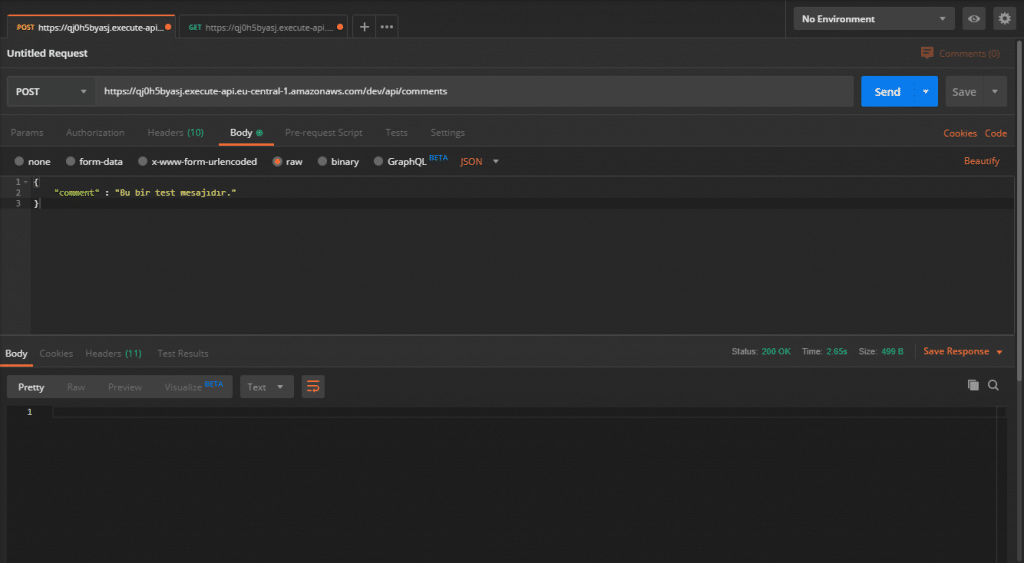
Make a POST request.
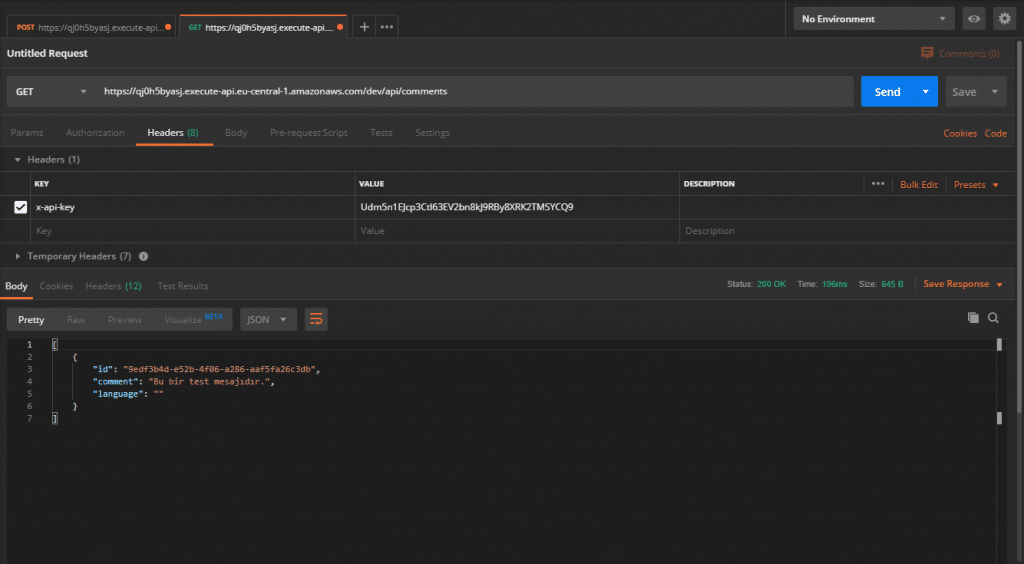
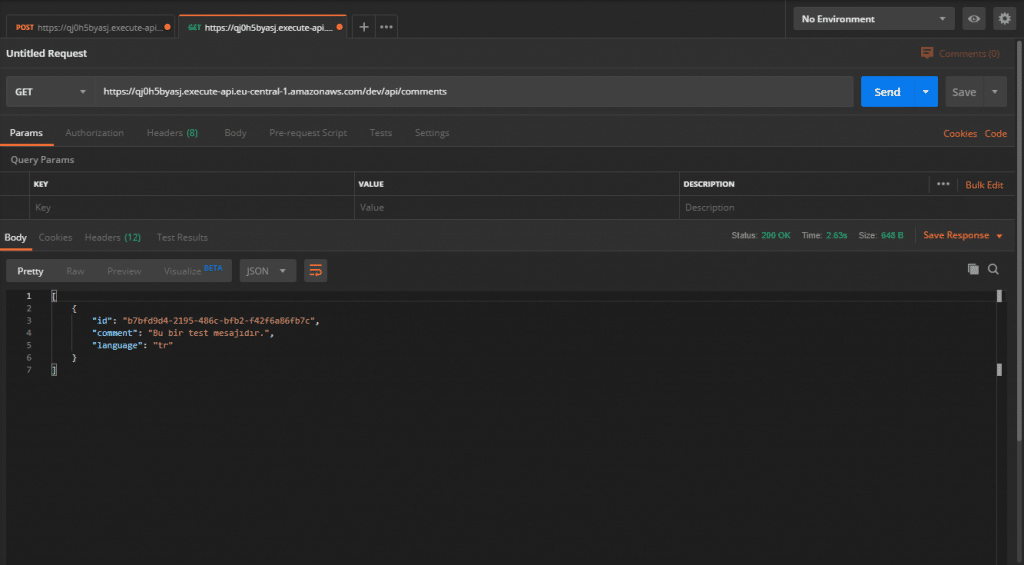
Make a GET request.
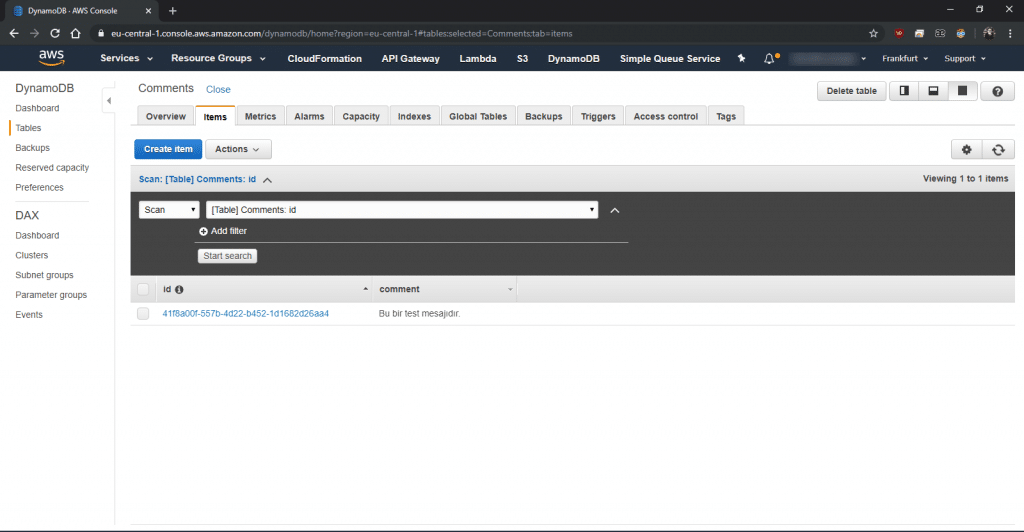
Let's look at what changed in AWS after the process.
A table has been created in DynamoDB and the record has been sent to the table with the POST request.
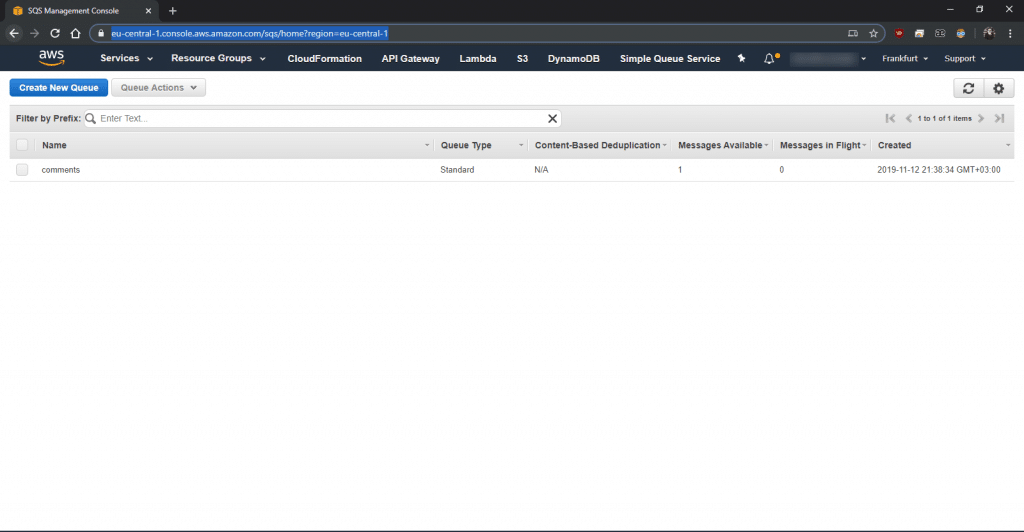
A queue has been created in SQS and a message has been sent to the queue with the POST request.
5. Preparing the Consumer Project
In this part, we will create the consumer project, which will process the messages we have sent to the queue in SQS. Create the consumer folder by running the following command line in the terminal from VS Code and enter it.
    mkdir consumer
cd consumer
Create our serverless project with the command line below.
serverless create --template aws-csharp --name comments-consumer
Start with cleaning first again. Delete the file named Handler.cs.
Change the "hello.zip" in the build.cmd and build.sh files in the project as "consumer-handler.zip". When we build the project, an artifact named properly shall be created. Shortly after, I will show how to use this artifact in serverless.yml.
It is necessary to install SQSEvents package to listen to messages in the queue in SQS, and Comprehend package to find the language of the comment text, and DynamoDB package for NoSQL. Install the packages with the following command lines.
    dotnet add package Amazon.Lambda.SQSEvents
dotnet add package AWSSDK.Comprehend
dotnet add package AWSSDK.DynamoDBv2
Create a folder named "Models" and create a file named "CommentsQueueRequest.cs" in it and paste the code below.
Create a file named "ConsumerHandler.cs" and paste the code below.
On the 21th line, take the message in SQS. Since we will take the messages one by one in our example, it is enough to take the value in the zero index. For example, if we were going to take the messages ten by ten, we would have to loop them.
On the 32th line, make the language querying of the comment text from the Comprehend service.
On the 48th line, update the line in DynamoDB.
For example, if an error occurs on the 35th line, this message is re-handled to be processed again.
Update the serverless.yml file with the code below.
On the 9th line, import the name of the DynamoDB table that we have exported in api project.
On the 13th line, give full access to the SQS we have created.
On the 18th line, give access to the language querying function in the Comprehend service.
On the 23th and 24th lines, give access to DynamoDB.
On the 35th line, connect the trigger to the queue in SQS.
On the 38th line, define that the messages should be transmitted to lambda one by one.
Build our code with the command line below.
build

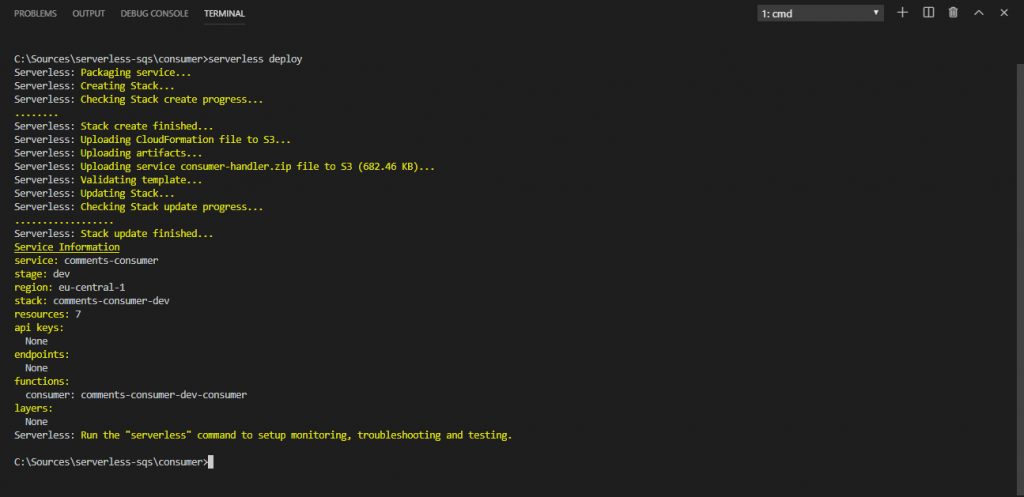
Make our deployment with the command line below.
serverless deploy
Let's look at what changed in AWS after the process.
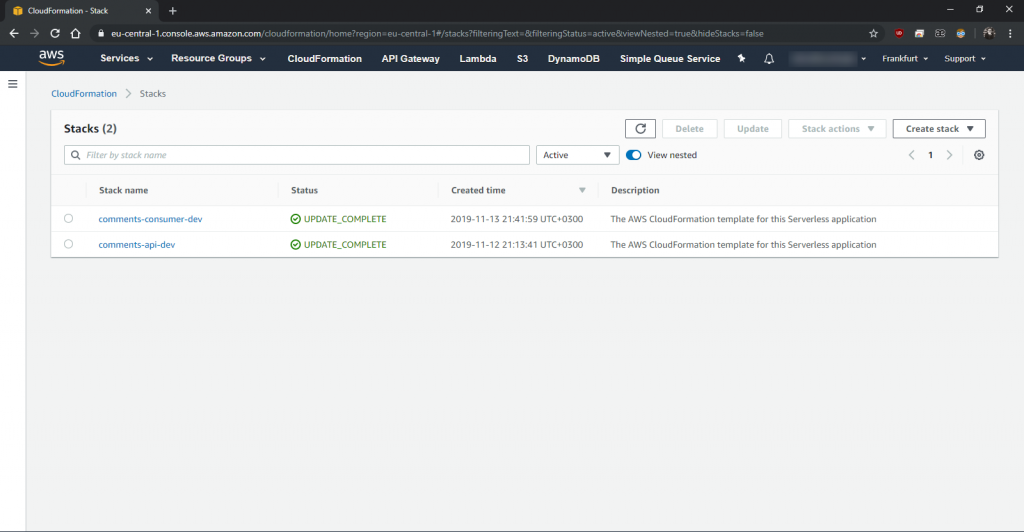
A stack has ben created in Cloud Formation.
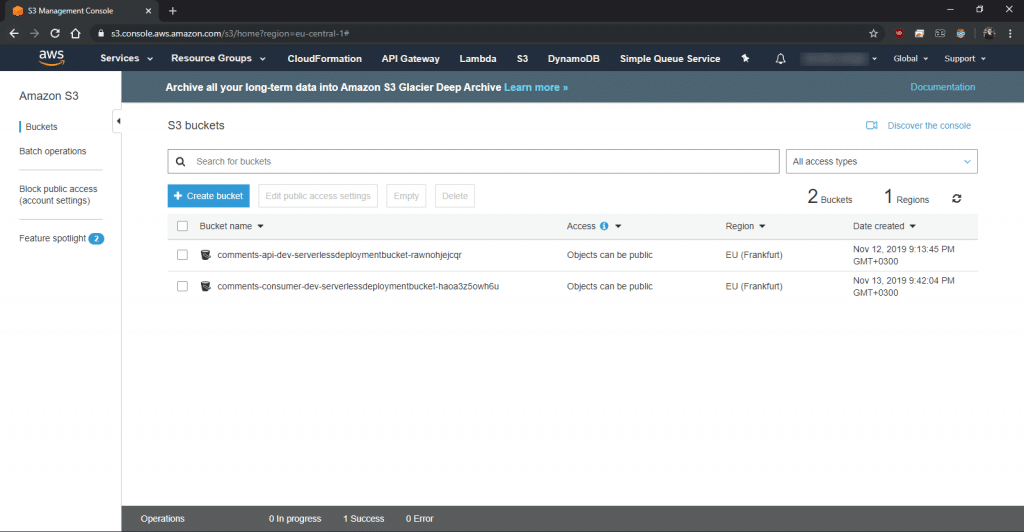
Our code has been sent to S3.
Our Lambda function has been created.
In the previous part, we have made a POST request and send a message on the queue in SQS. Now, that message has been processed. When you make a GET request, you will see that the language of the comment text is updated.
You can continue trying by making POST requests.
You can access the final version of the project from Github.
Good luck.
Leave a comment
Reply to
Cancel reply