1. Introduction
This article series is about how to develop RestfulAPI with a serverless approach. We will use AWS as a cloud provider.
In this part, i will show the scenario and give information about what will be the result.
Our RESTful API endpoints will be like below.
[POST] api/ads
[PUT] api/ads/{id}
[DELETE] api/ads/{id}
[GET] api/ads
[GET] api/ads/{id}
We will use the following AWS services.
API Gateway : It will provide the endpoints we need for the RESTful API.
Lambda : It will provide us to write function for the GET, POST, PUT and DELETE requests.
DynamoDB : It will provide NoSQL solution. In the POST, PUT and DELETE requests, we will write the data to the DynamoDB.
ElasticCache : It will provide the distributed cache solution. In the GET request, we will read the data from Redis.
S3 : It will provide our code to be versioned and stored after each deployment.
CloudFormation : It will provide us to create and manage automatically all services mentioned above.
When the project is done, the architecture on AWS will be like below.
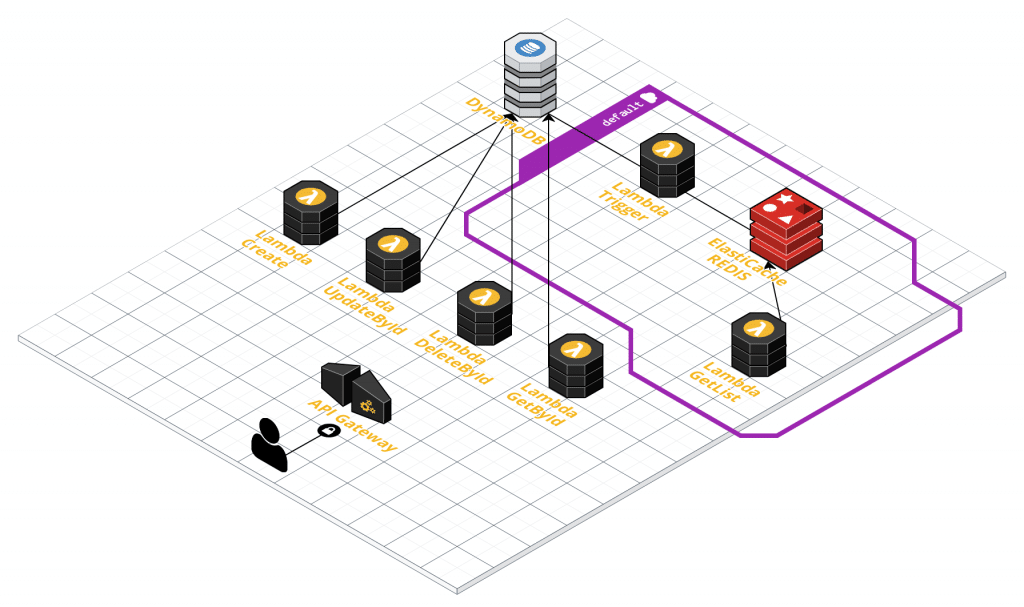
As a result, the record will be sent to the DynamoDB which is NoSQL solution of AWS in the POST request. Record changes in our DynamoDB table will be sent on the ElasticCache which is the solution service of the distributed cache of AWS. The data in the GET request will be read from ElasticCache instead of the DynamoDB.
2. Preparing the Development Environment
In this part, we will arrange our development environment.
Requirements
- Visual Studio Code
- AWS Account
- AWS CLI
- Serverless Application Framework
2.1. Creating a User in AWS Console
Creating an authorized user in AWS is required to make deployment with serverless.
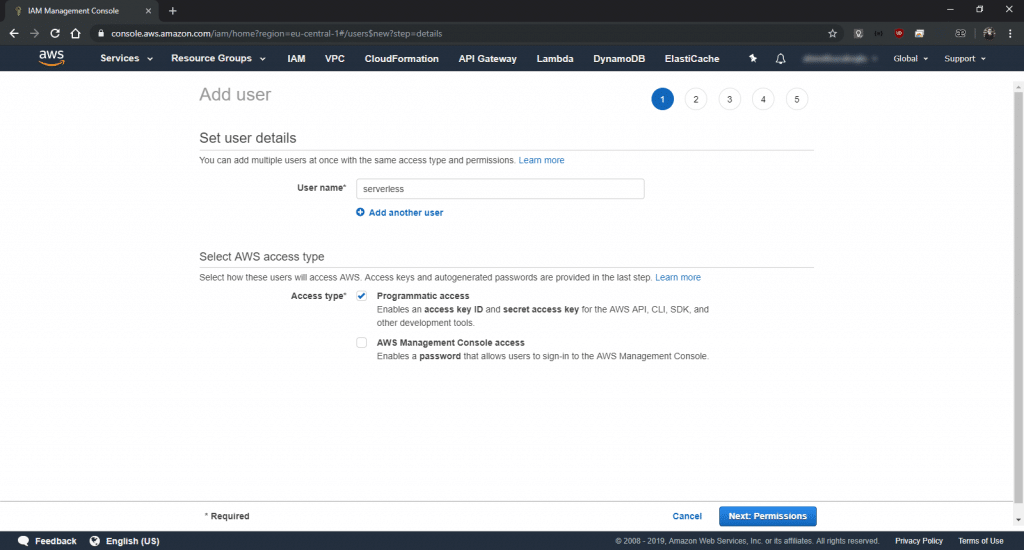
Go to IAM from AWS Console. Choose "User" on the left menu. Click the "Add user" button.
Write "serverless" in the username fied. Choose "Programmatic Access" from the Access type section. Go to the second step(Permissions).
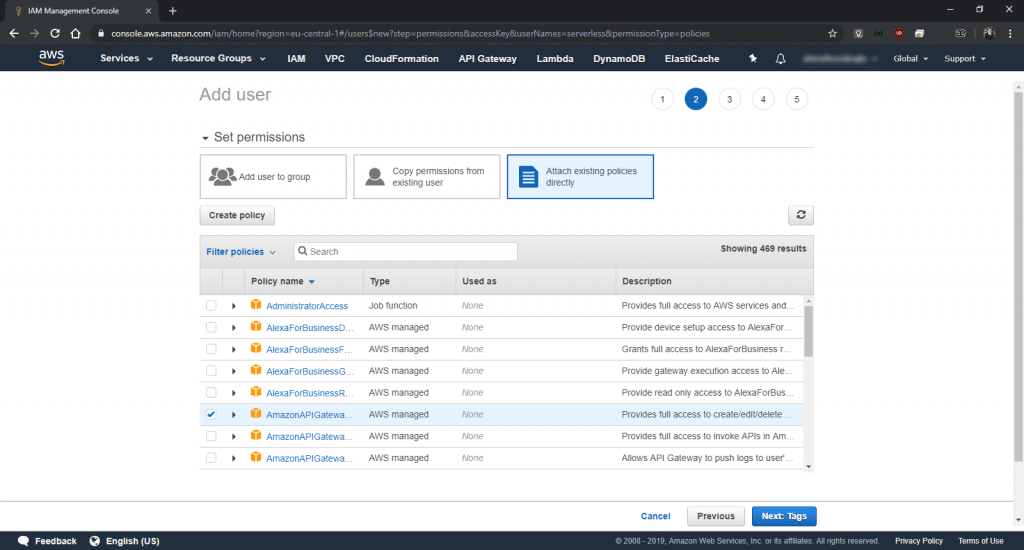
Choose "Attach existing policies directly" from the Permissions section. Give the following policies. Go to the third step(Tags).
- AWSLambdaFullAccess
- IAMFullAccess
- AmazonS3FullAccess
- CloudWatchLogsFullAccess
- AmazonAPIGatewayAdministrator
- AWSCloudFormationFullAccess
- AmazonDynamoDBFullAccess
- AmazonElastiCacheFullAccess
Write "Application" in the Tag Key field and "Serverless RESTful API" in the Tag Value field. Go to the fourth step(Review).
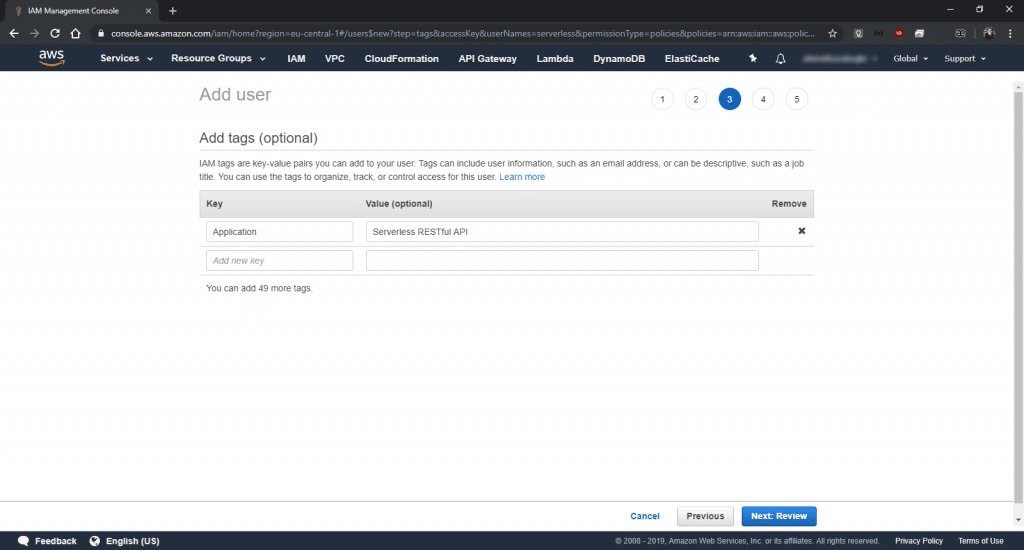
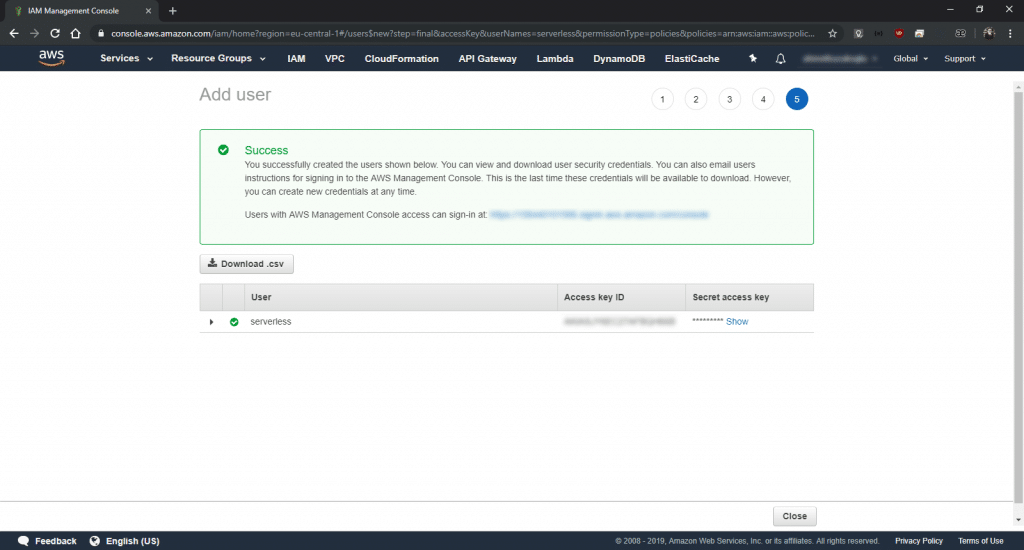
Click the "Create User" button.
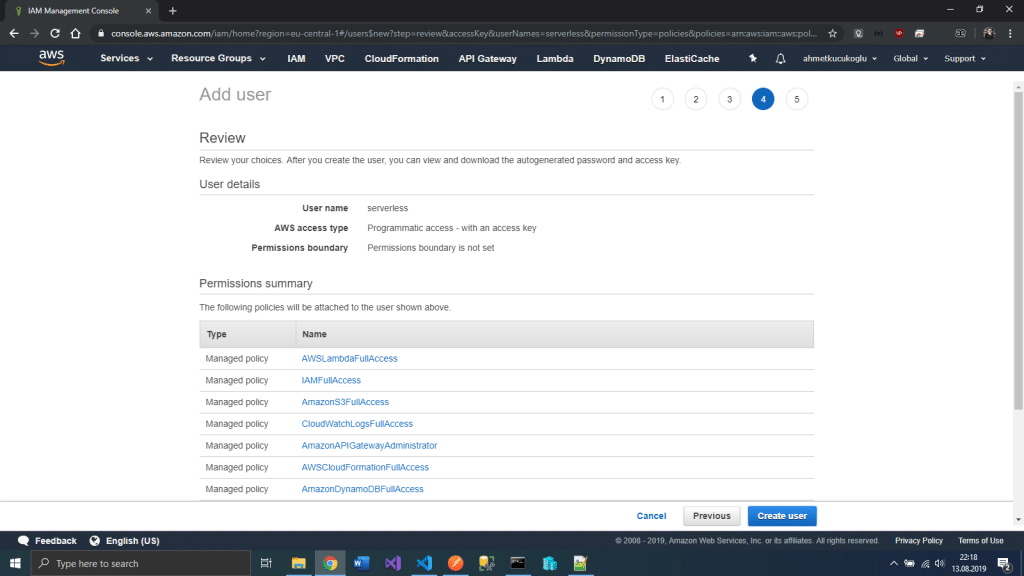
On the screen, you will see the information about Access Key Id and Secret Access Key. Keep them in a side.
2.2. The Installation of AWS CLI
Open Command Prompt and run command line below.
aws configure --profile serverlessuser
AWS Access Key ID : The Access Key Id you will copy
AWS Secret Access Key : The Secret Access Key you will copy
Default region name : eu-central-1
Default output format : json
2.3. The Installation of the Serverless Framework
We will use the Serverless Application Framework to develop this application. You can visit the address below for the installation.

3. Preparing the Endpoints
In this part, we will create the project and make deployment in a simplest way. We will not send a record to the DynamoDB yet. We will GET response after sending request to the endpoints.
Create the project folder with the command line below.
mkdir serverless-api && cd serverless-api
Create the serverless project with the command line below.
serverless create --template aws-nodejs --name ads-api
Open the project with the command line below via Visual Studio Code.
code .
Update the serverless.yml file like below.
serverless.yml v1
Delete the handler.js file. Create 4 files to be named as "create.js", "update.js", " delete.js" and "getByld.js".
create.js v1
update.js v1
delete.js v1
getAll.js v1
getById.js v1
Create a file named "create_request.json" in the project folder and paste the json in it. Define the POST request model. Set required fields.
create_request.json
Create a file named "update_request.json" in the project folder and paste json in it. Define the PUT request model. Set required fields.
update_request.json
Make deployment to AWS by using the command line below.
serverless deploy
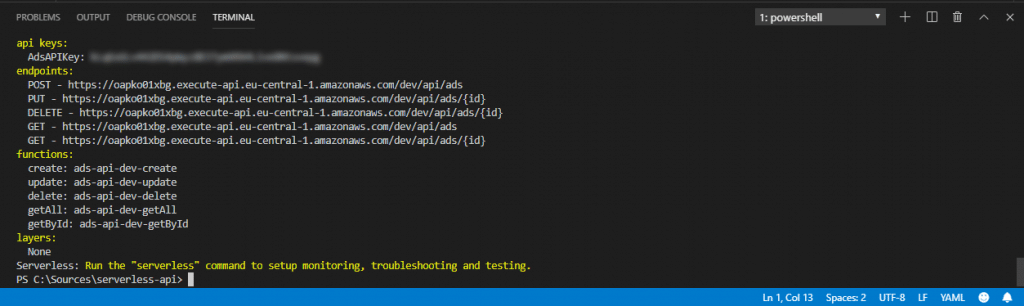
After the deployment, in a simplest way, lambda functions and the API endpoints to those functions is created.
After the deployment process, will write 5 API endpoints and 1 API Key on the console.
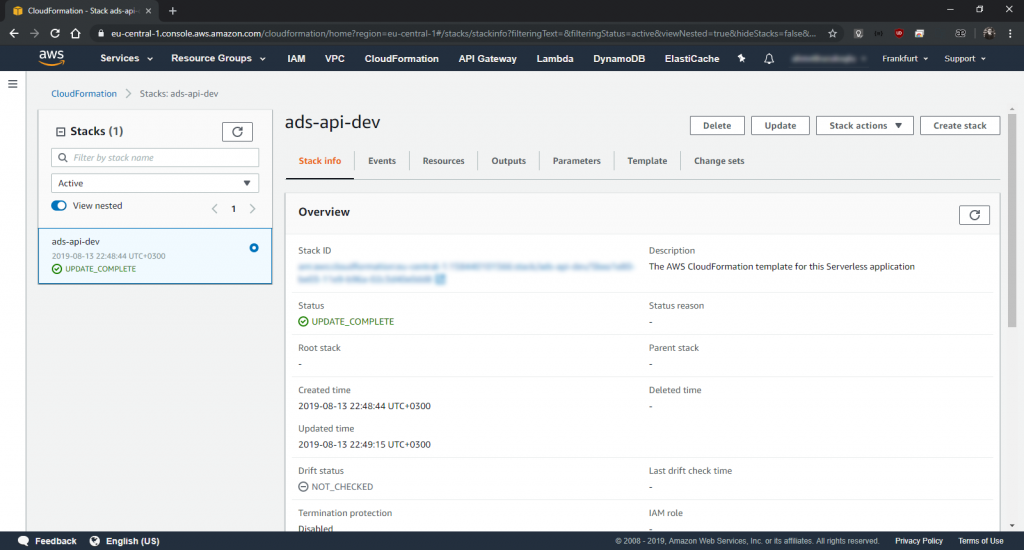
Let's look at what changed in AWS after the process.
Stack is created in the Cloud Formation.
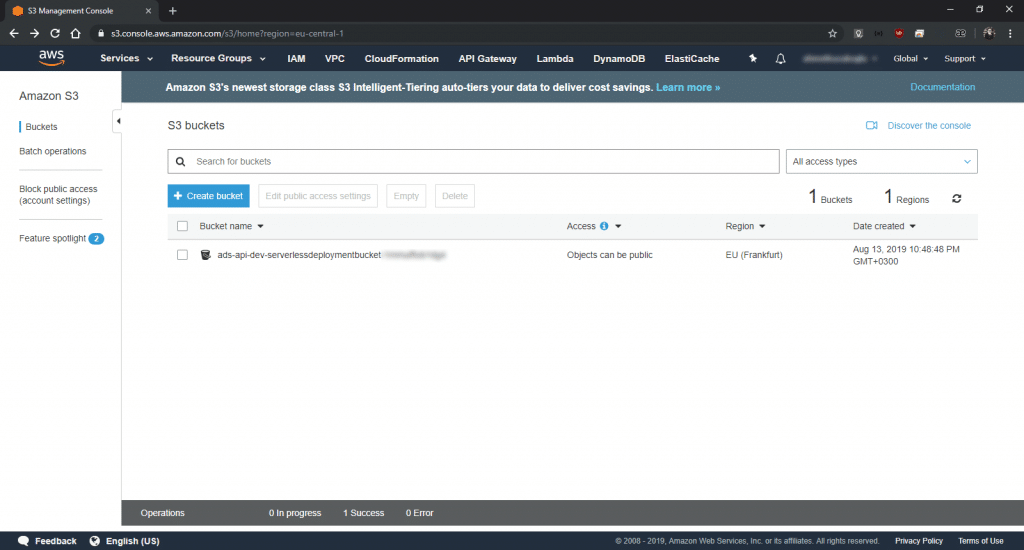
Our code is sent to S3.
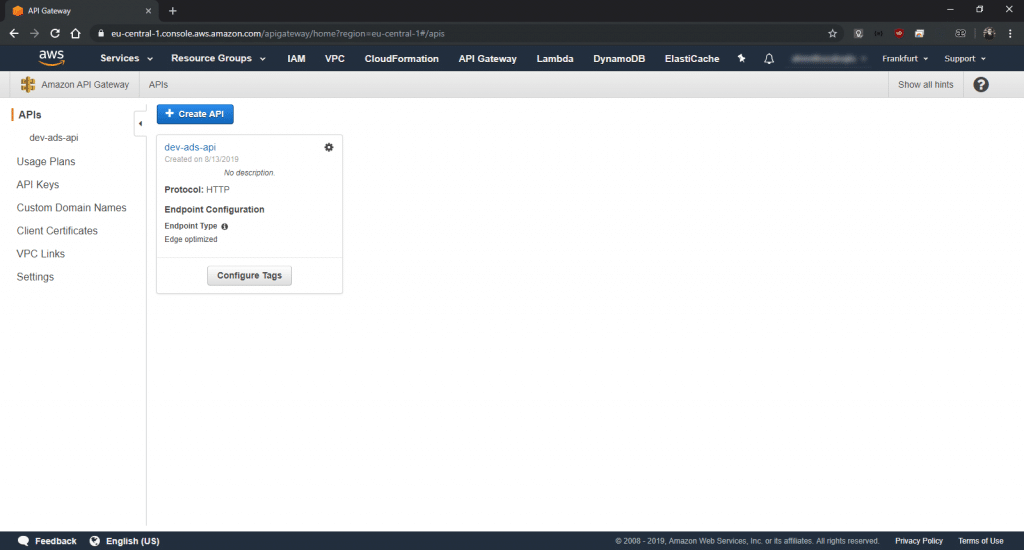
API Gateway is created for the endpoints.
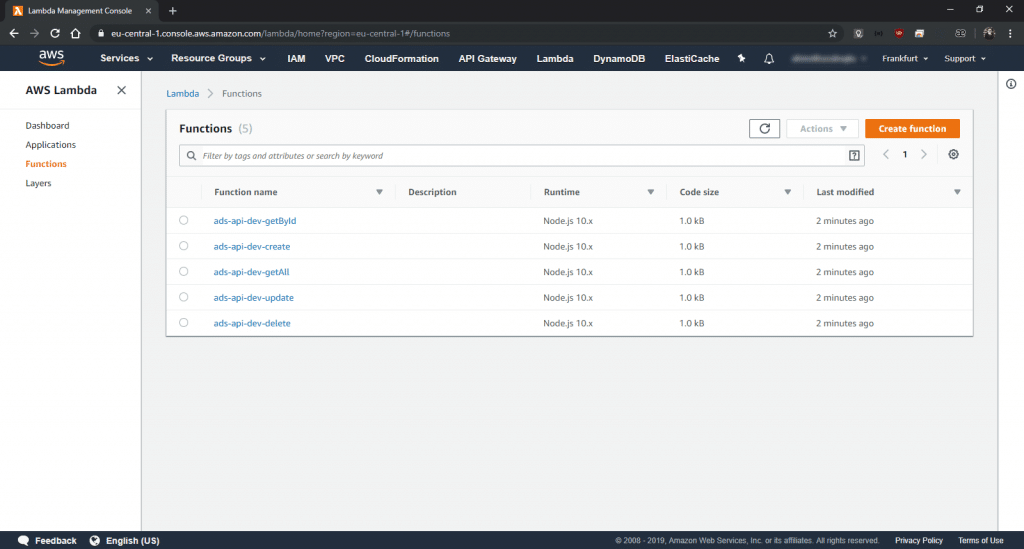
Lambda functions are created.
4. DynamoDB Integration
In this part, we will write the data coming over the API to DynamoDB. We will read the data from DynamoDB.
Install the required packages by using the command lines below.
    npm i aws-sdk
npm i uuid
Update the serverless.yml file like below.
serverless.yml v2
Update the files of create.js, update. js, delete.js, getAll.js and getByld.js like below.
create.js v2
update.js v2
delete.js v2
getAll.js v2
getById.js v2
Make the second deployment to AWS with the command line below.
serverless deploy
Let's look at what changed in AWS after the process.
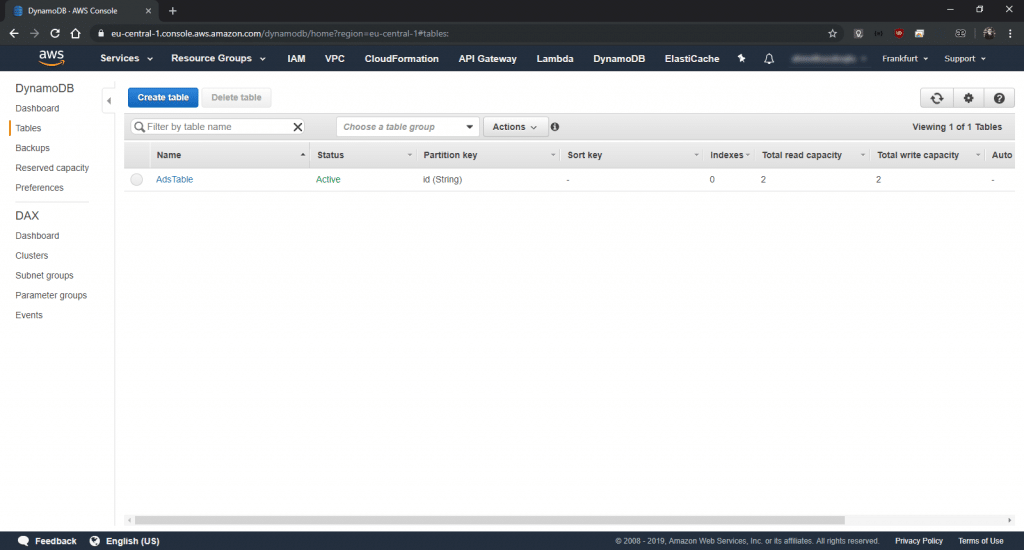
A table is created in the DynamoDB.
5. Redis Integration
In this last chapter, we will transfer the streams in the DynamoDB(adding, udating and deleting) to ElastiCache Redis and do reading from Redis in the GetAll request.
Install the required packages with the command lines below.
npm i redis
Before starting to make update in the files, you need to learn the subnetlds by entering AWS console.
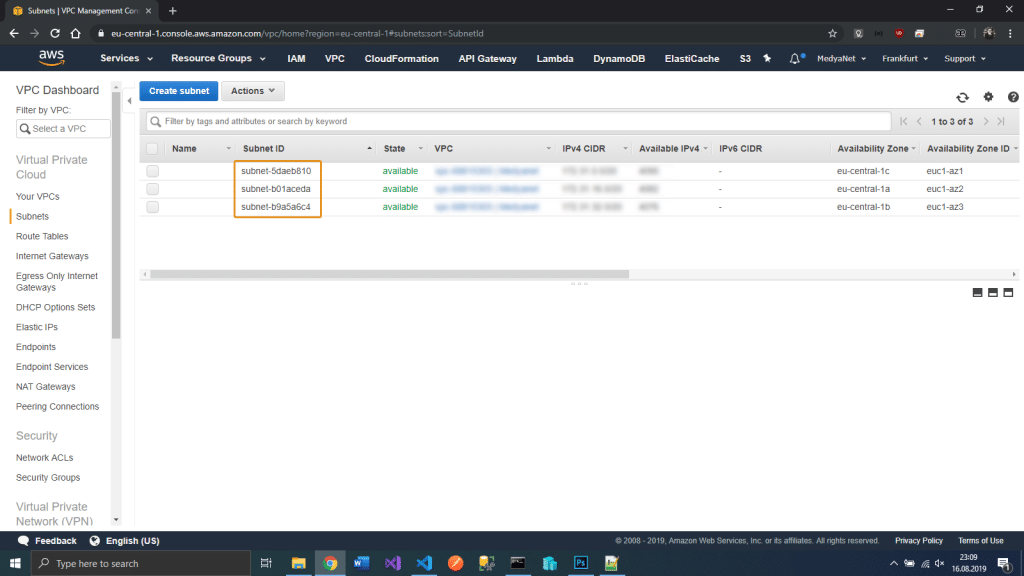
Update the serverless.yml file like below. You need to update the subnetlds parts with your own information.
serverless.yml v3
Update the getAll.js file like below.
getAll.js v3
Create a new file named trigger.js.
trigger.js
Make the third and last deployment to AWS with the command line below.
serverless deploy
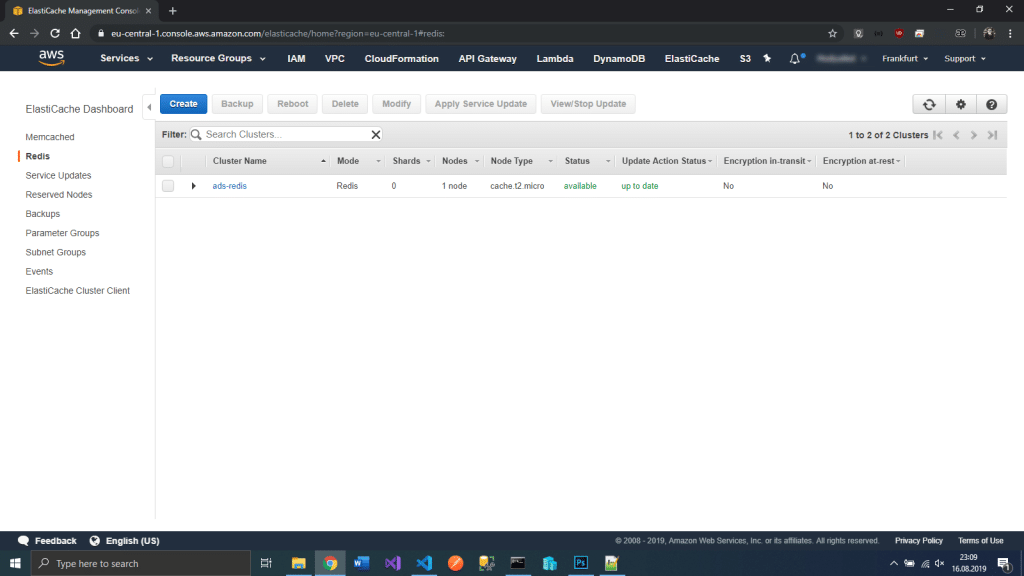
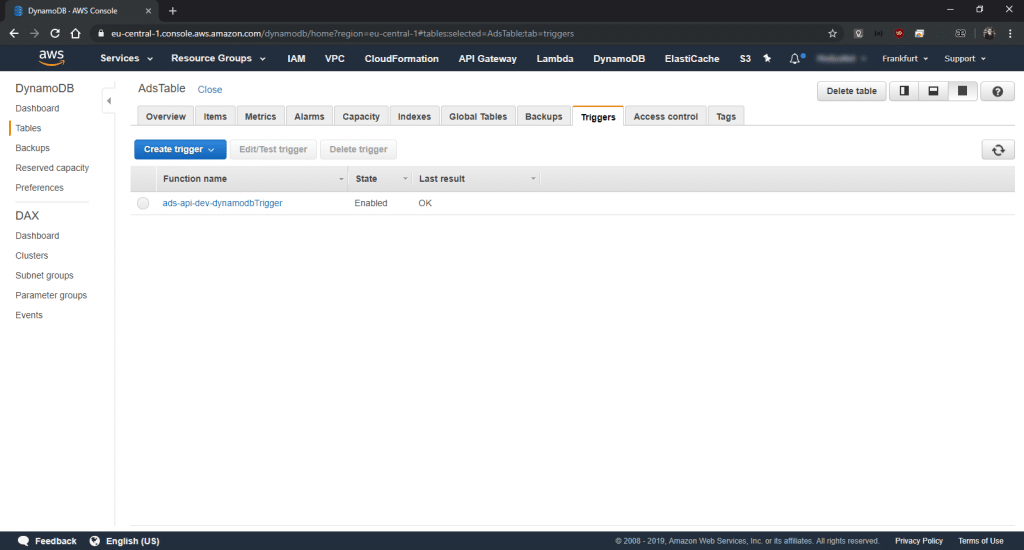
Let's look at what changed in AWS after the process.
ElasticCache is created.
Trigger is assigned to the DynamoDB.
You can access the final version of the project from Github.
Good luck.
Leave a comment
Reply to
Cancel reply